vue快速入门项目 TodoList 项目笔记
本文档用于练习、完整记录视频课程的内容,原项目视频网址:https://www.bilibili.com/video/BV157411V7Dh?p=1
快速开始
项目初始化(在vscode的terminal中执行)
C:\Users\Administrator\Desktop\vue_todo>npm init -y
#会生成package.json文件
{
  "name": "vue_todo",
  "version": "1.0.0",
  "description": "",
  "main": "index.js",
  "scripts": {
    "test": "echo \"Error: no test specified\" && exit 1"
  },
  "keywords": [],
  "author": "",
  "license": "ISC"
}
webpack用来打包(-D开发环境)
C:\Users\Administrator\Desktop\vue_todo>npm install -D webpack webpack-cli
#会增加node_modules目录存放安装的依赖包
#package.json文件增加下面几行内容(表示开发时依赖的2个包)
  "devDependencies": {
    "webpack": "^4.44.1",
    "webpack-cli": "^3.3.12"
  }
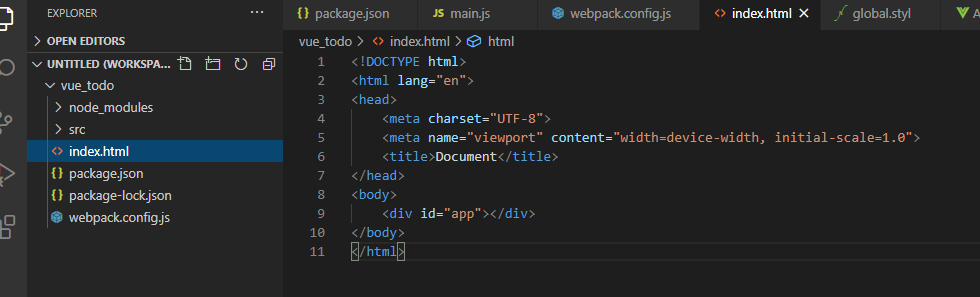
编写项目入口index.html
#vscode通过!回车,快速创建html内容模板,直接输入div快速打开div标签
<!DOCTYPE html>
<html lang="en">
<head>
    <meta charset="UTF-8">
    <meta name="viewport" content="width=device-width, initial-scale=1.0">
    <title>Document</title>
</head>
<body>
    <div id="app"></div>
</body>
</html>
创建main.js 作用创建Vue根实例 挂载App组件(通过npm install vue来安装vue)
#创建src目录,在src目录下创建main.js
C:\Users\Administrator\Desktop\vue_todo>npm install vue
#package.json文件增加下面几行内容
"dependencies": {
    "vue": "^2.6.12"
  }
#main.js
//1、创建vue根实例
import Vue from 'vue'
new Vue({
    el:'#app'
})
//2、挂载App组件
挂载App组件
- 在src目录下编写App.vue文件(安装vscode插件),示例:

//模板
<template>
    <div>this is App</div>
</template>

<script>
//用于导出的组件名称
export default {
    name: 'App'
}
</script>

<style scoped>
//样式
</style>
- 找到修改main.js
//创建vue根实例
import Vue from 'vue'
//导入App组件
import App from './App.vue'


//创建vue根实例
new Vue({
    el:'#app',
    //局部组建挂载
    components:{
        // 组件名:组件对象(对象通过App.vue导入)
        App:App
    },
    //template: '<App/>'的作用将**组件标签'<App/>'**,插入替换<div id="app"></div>中的内容。
    template: '<App/>'
})
//挂载App组件
使用webpack打包(因为浏览器不识别import Vue from 'vue')
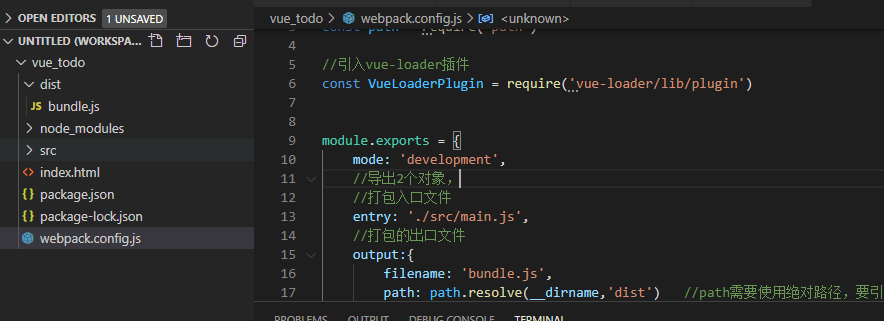
#在项目根目录下,创建默认打包文件webpack.config.js
//导入path模块
const path = require('path')
module.exports = {
    //导出2个对象,
    //打包入口文件
    entry: './src/main.js',
    //打包的出口文件
    output:{
        filename: 'bundle.js',
        path: path.resolve(__dirname,'dist')   //path需要使用绝对路径,要引入node的path
    }
}
在package.json文件中编写打包脚本,用于打包(前提:安装vue-loader)
#在script增加build这一行
  "scripts": {
    "test": "echo \"Error: no test specified\" && exit 1",
    "build": "webpack"
  },
#在控制台使用C:\Users\Administrator\Desktop\vue_todo>npm run build打包
安装vue-loader(依赖css-loader)
C:\Users\Administrator\Desktop\vue_todo>npm install  -D vue-loader vue-template-compiler
C:\Users\Administrator\Desktop\vue_todo>npm install  -D css-loader
配置打包规则和插件,修改默认webpack配置文件webpack.config.js
//导入path模块
const path = require('path')
//引入vue-loader插件
const VueLoaderPlugin = require('vue-loader/lib/plugin')
module.exports = {
    //导出2个对象,
    //打包入口文件
    entry: './src/main.js',
    //打包的出口文件
    output:{
        filename: 'bundle.js',
        path: path.resolve(__dirname,'dist')   //path需要使用绝对路径,要引入node的path
    },
    //打包规则,以.vue结尾用vue-loader打包
    module: {
        rules: [{
            test: /\.vue$/,
            loader: 'vue-loader'
        }]
    },
    //插件
    plugins: [
        new VueLoaderPlugin()
    ]
}
运行打包脚本:
C:\Users\Administrator\Desktop\vue_todo>npm run build
#mode: 'production',或者development打包的文件一个可读一个压缩不可读。
修改index.html 的js引入文件
<script src="./dist/bundle.js"></script>
处理webpack默认引入vue.common.js不是vue.js(配置后重新打包,在浏览器打开index.html)
#修改默认webpack配置文件webpack.config.js,在插件下增加
    resolve: {
        alias: {
            'vue':'vue/dist/vue.js'
        }
    }
- webpack本身只能打包js文件,如果打包其他文件需要借助loader。
- loader就是专门打包特定文件的处理程序。
常用其他loader
file-loader 文件打包工具
官方文档:https://www.webpackjs.com/loaders/file-loader/
安装
C:\Users\Administrator\Desktop\vue_todo>npm install -D file-loader
#安装后package.json,的devDependencies增加一个loader
配置
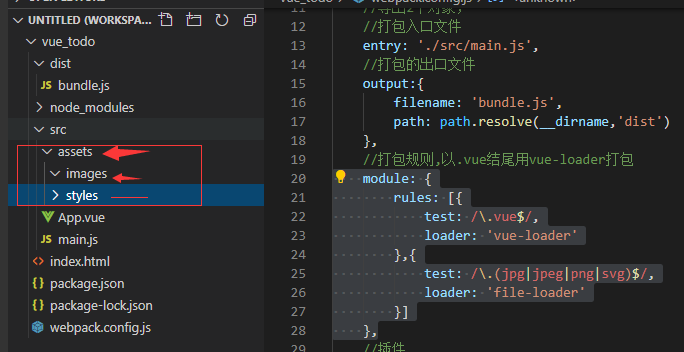
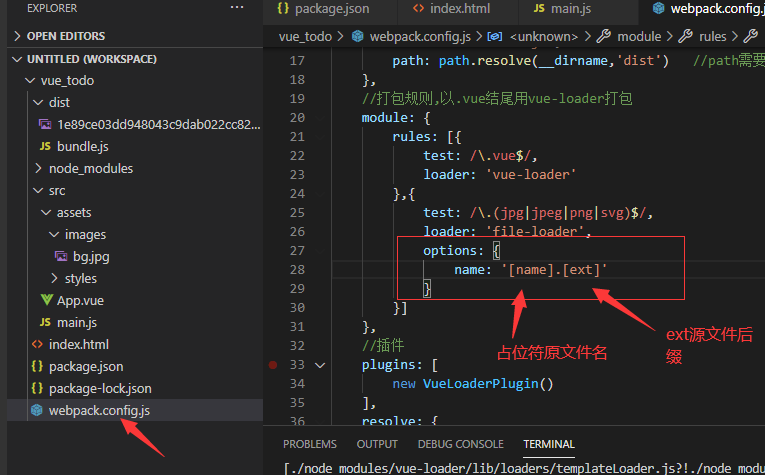
修改webpack.config.js的module增加一个test
    module: {
        rules: [{
            test: /\.vue$/,
            loader: 'vue-loader'
        },{
            test: /\.(jpg|jpeg|png|svg)$/,
            loader: 'file-loader'
        }]
    },
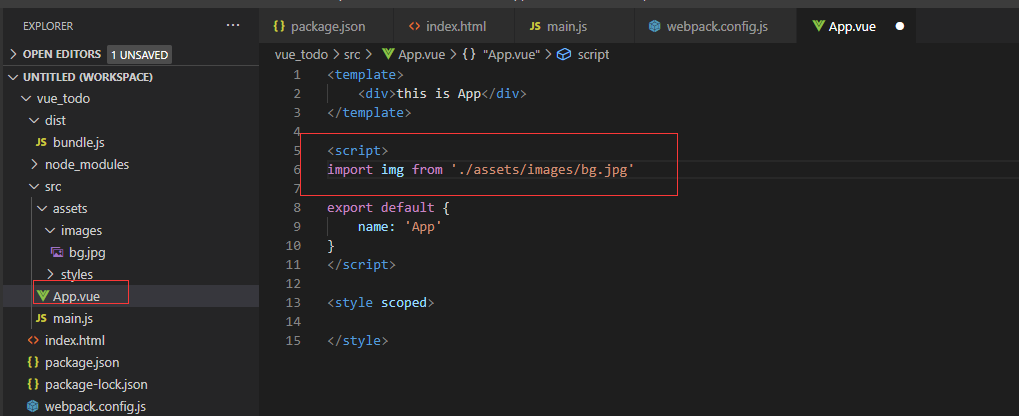
创建存放图片的目录如下(并放入bg.jpg图片):
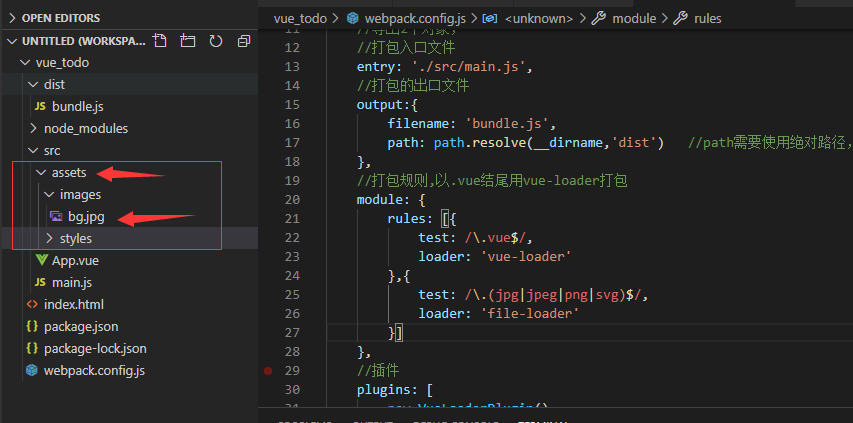
修改App.vue,导入图片,(然后运行npm run build,在dist中生成名字哈希后的图片)
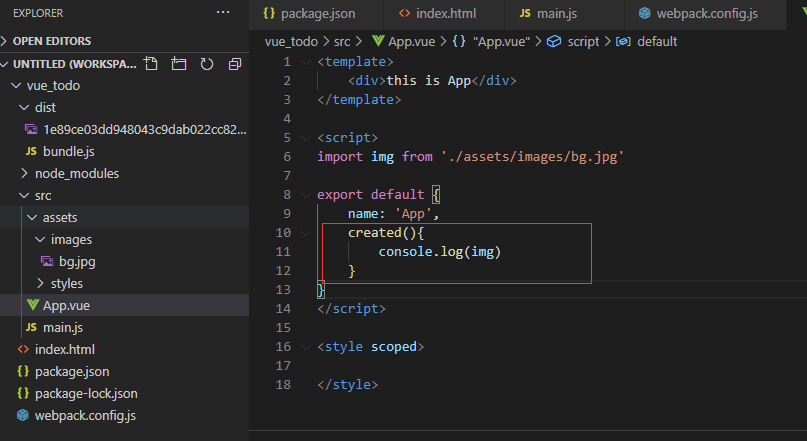
测试输出img的值,修改App.vue,重新打包,然后浏览器打开index.html,通过F12查看 console.log
打包不用hash文件名,保存原名,修改打包规则,增加选项配置,重新打包,再次访问index.html。
url-loader
url-loader : 功能类似file-loader,在文件大小低于指定限制时,返回一个dataurl,将小图片以base64打包在js中,减少http请求次数。
安装
C:\Users\Administrator\Desktop\vue_todo>npm install -D url-loader
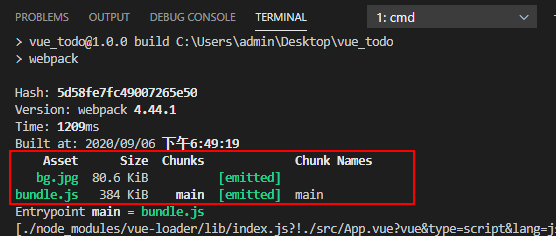
配置webpack.config.js,增加limit(单位byte),然后运行npm run build,可以看到只有2个文件被生成到dist目录
            test: /\.(jpg|jpeg|png|svg)$/,
            loader: 'url-loader',
            options: {
                name: '[name].[ext]',
                limit: 2048
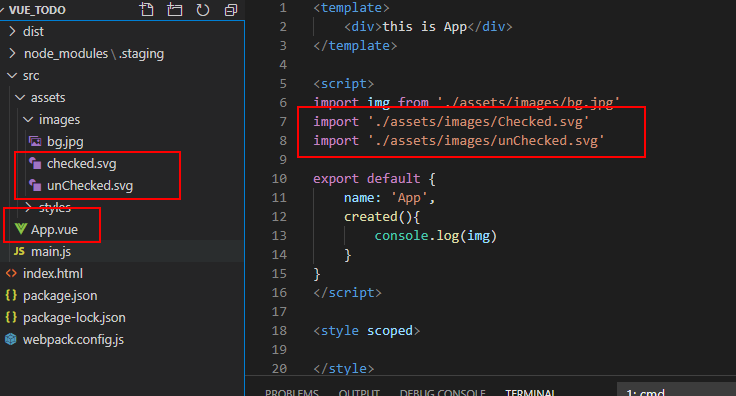
在assets 中放入2个小图片,再App.vue中引入
css-loader 和style-loader 打包css文件
- css-loader 把所有css文件打包成一个文件.
- style-loader , 将css-loader打包生成的文件挂载到页面head标签的style中.
因为前面安装了css-loader,这里只安装一个style-loader
C:\Users\admin\Desktop\vue_todo>npm install -D style-loader
配置打包文件

创建css文件
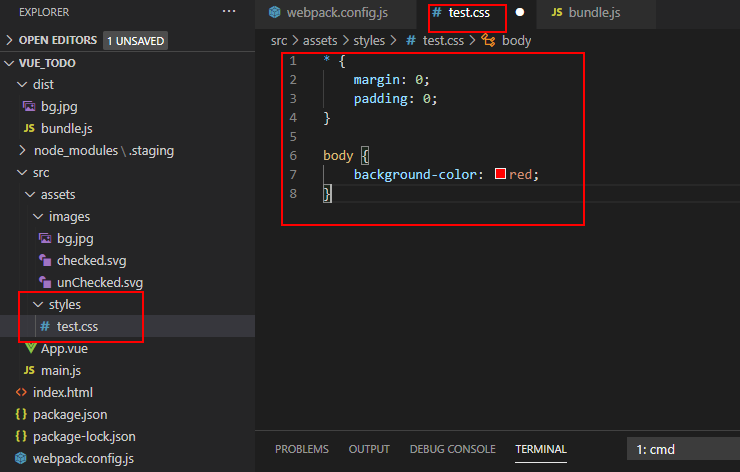
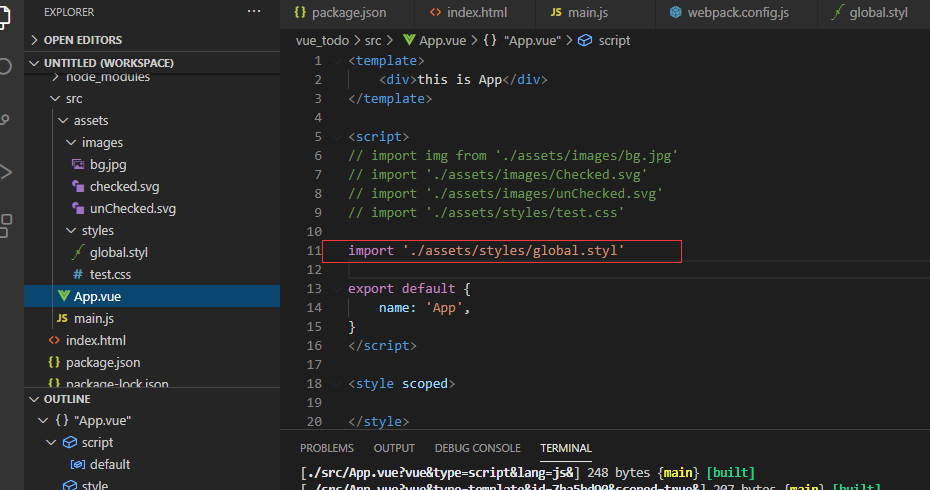
在App.vue中引入css文件
import './assets/styles/test.css'
npm run build打包测试
打包stylus文件
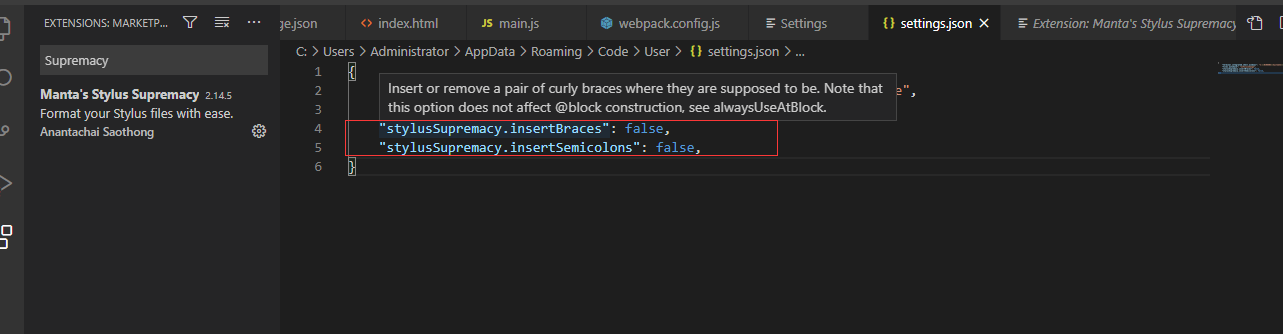
vscode插件安装
目前stylus 作为node项目普遍使用的css预处理器被广泛应用于vue项目
vscode插件安装: language-stylus:提供语法高亮效果和一些支持。 Supremacy:自动化格式stylus的插件,定制stylue格式,比如是否要;,:
setting.json 设置()
//stylus 不适用{}
"stylusSupremacy.insertBraces": false,
//stylus 不适用;
"stylusSupremacy.insertSemicolons": false,
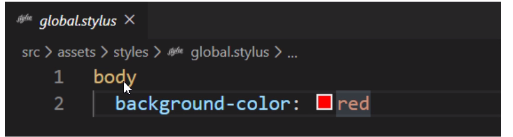
设置之后的stylus样子如下:
使用stylus-loader
安装
C:\Users\Administrator\Desktop\vue_todo>npm install -D stylus stylus-loader
- stylus 是stylus文件预处理程序,将stylus编译成xss格式
- stylus-loader 加载stylus文件,调用stylus预处理程序形成css文件
配置

编写styl文件
在App.vue中导入styl文件
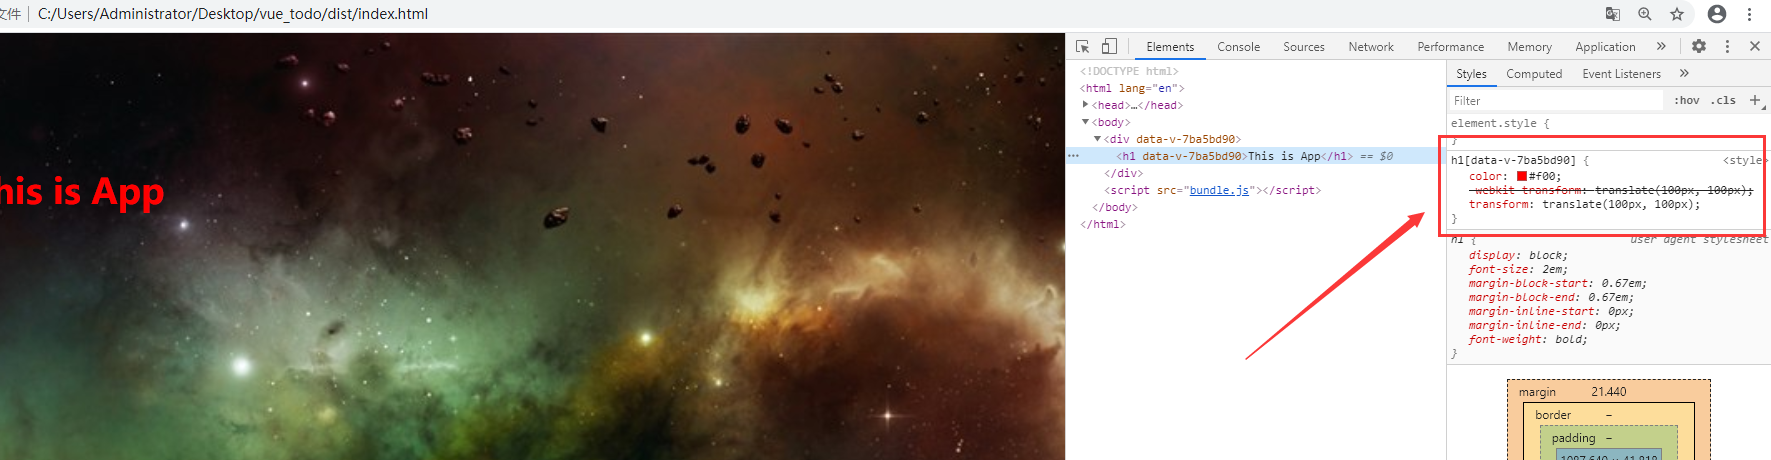
打包,并测试访问index.html,通过F12发现,找不到图片

临时解决方案,将index.html放到dist目录,并修改js的引用位置
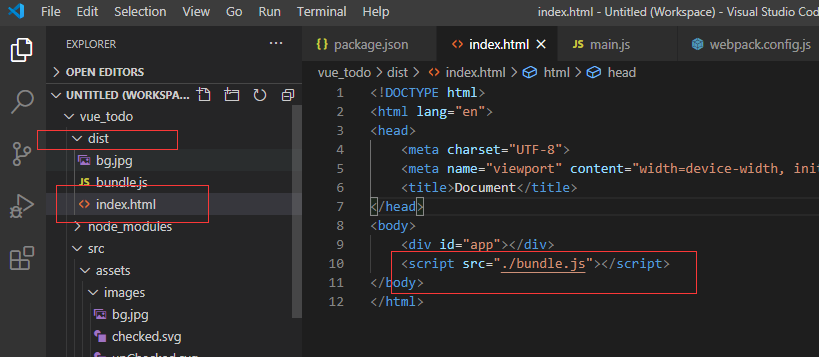
再次打包,并访问index.html查看已经生效。
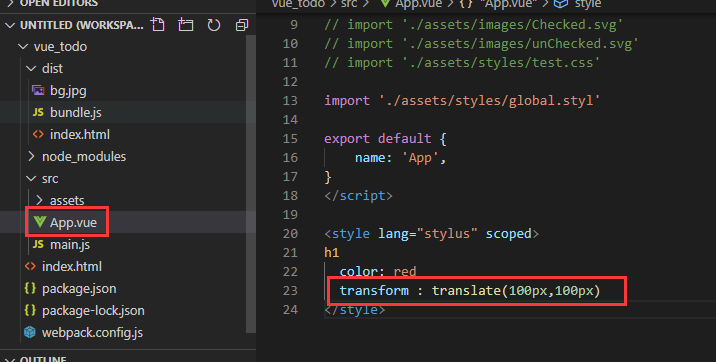
处理vue文件中的stylus
修改App.vue,增加h1标签
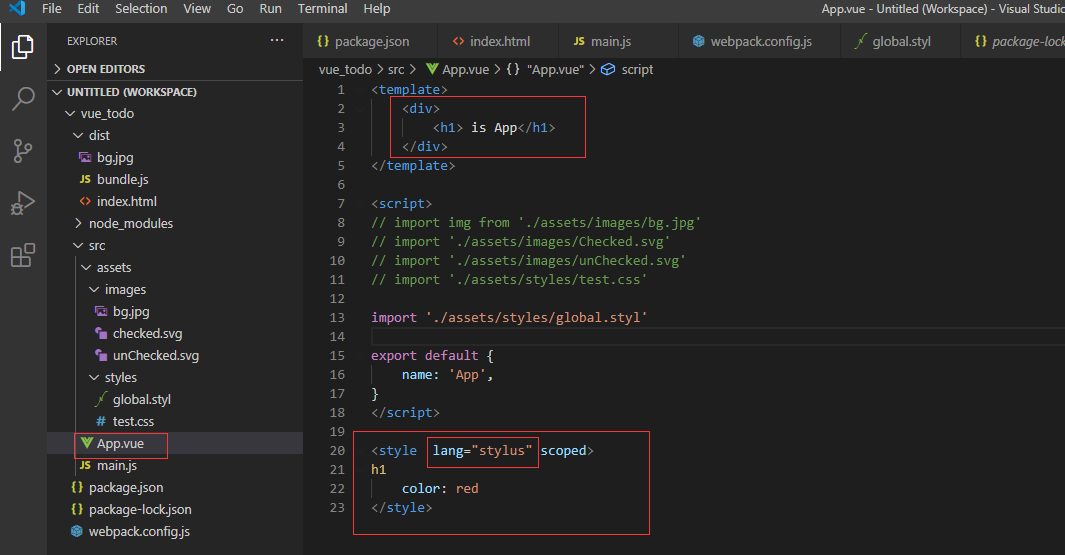
再次build,并访问index.html(在杰哥的视频中,要修改打包的配置use: ['vue-style-loader','css-loader','stylus-loader'],试了一下不好使,不用改vue-style-loader)
插件
打包时,在特定时刻,自动执行的处理程序。
演示:
html-webpack-plugin插件
安装
C:\Users\Administrator\Desktop\vue_todo>npm install -D html-webpack-plugin
配置webpack.config.js
//开头增加
const HtmlWebpackPlugin = require('html-webpack-plugin')


    plugins: [
        new VueLoaderPlugin(),
        new HtmlWebpackPlugin({
            template: './index.html'
        })
    ],
在项目根目录下创建index.html
<!DOCTYPE html>
<html lang="en">
<head>
    <meta charset="UTF-8">
    <meta name="viewport" content="width=device-width, initial-scale=1.0">
    <title>Document</title>
</head>
<body>
    <div id="app"></div>
</body>
</html>
删除dist目录,重新打包,可以看到新生成的dist目录下的index.html文件
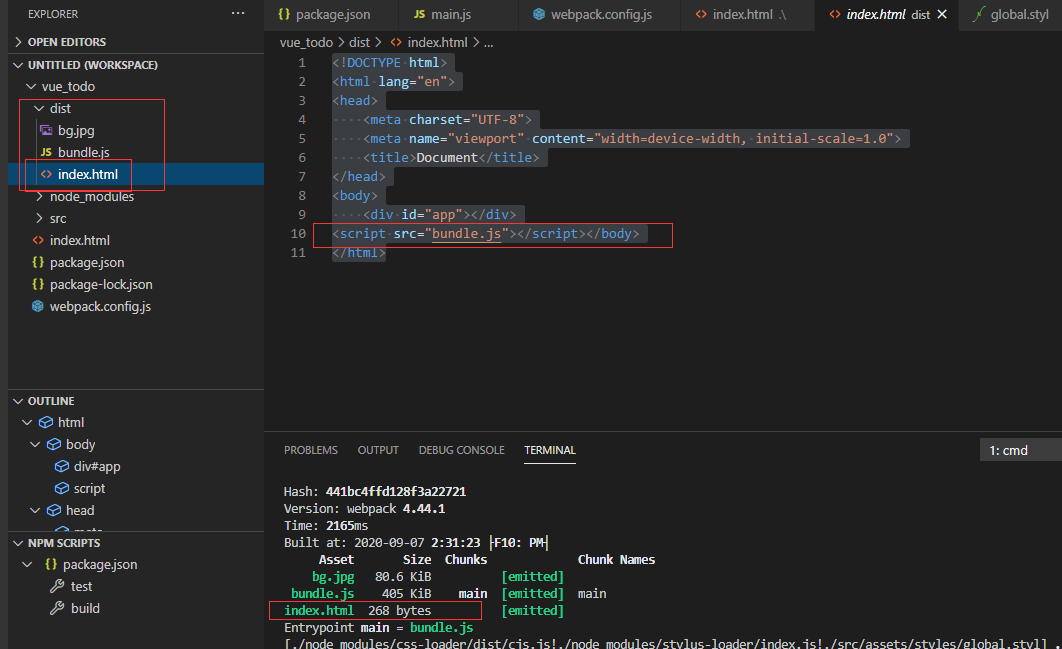
- 总结:在打包结束时,此插件在dist目录下生成index.html, 并把打包好的js引入到html中。
clean-webpack-plugin插件
在打包之前删除dist目录的文件
npm install -D clean-webpack-plugin
配置webpack.config.js
// 引入clean-webpack-plugin,es6解构语法
const { CleanWebpackPlugin } = require('clean-webpack-plugin')
//...省略部分内容...
    plugins: [
        new VueLoaderPlugin(),
        new HtmlWebpackPlugin({
            template: './index.html'
        }),
        new CleanWebpackPlugin()
    ],
打包(修改filename: 'bundle.js'为其他名字)测试查看bundle.js是否被删除。
autoprefixer 插件
自动添加浏览器厂商前缀,依赖于postcss-loader
npm install -D postcss-loader autoprefixer
配置webpack.config.js
            test: /\.styl(us)?$/,
            use: ['style-loader','css-loader','postcss-loader','stylus-loader']
配置postcss.config.js(新建)
module.exports = {
    plugins: [
        require('autoprefixer')
    ]
}
在package.json中增加
  "browserslist": [
    "defaults",
    "not ie < 11",
    "last 2 versions",
    "> 1%",
    "iOS 7",
    "last 3 iOS versions"
  ]
打包测试
开发环境设置
webpack-dev-server 提供简单的web服务器,并且实时重新加载
安装: npm install -D webpack-dev-server
配置webpack.config.js
module.exports = {
    mode: 'development',
    //导出2个对象,
    //打包入口文件
    devServer: {
        contentBase: './dist',
        open: true
    },
配置package.json,作用npm run start 执行webpack-dev-server,加载devserver配置
  "scripts": {
    "test": "echo \"Error: no test specified\" && exit 1",
    "build": "webpack",
    "start": "webpack-dev-server"
  },
更改App.vue的内容发现,浏览器内容实时刷新
热模块替换
运行时更新各种模块,无需进行完全刷新。
编辑App.vue,
<template>
    <div>
        <h1>Todolist</h1>
        <input type="text" v-model="content">
        <button @click="addTodo">添加</button>
        <ul>
            <li v-for="(item,index) of todoData" :key="index">{{item}}</li>
        </ul>
    </div>
</template>

<script>
import './assets/styles/global.styl'

export default {
    name: 'App',
    data() {
        return {
            todoData: ["todo1","todo2","todo3"],
            content:""
        }
    },
    methods: {
        addTodo(){
            if (this.content === "") return
            this.todoData.push(this.content)
            this.content = ""
        }
    }
}
</script>

<style lang="stylus" scoped>
li:nth-of-type(odd)
  color: blue
</style>
配置webpack.config.js
//引入插件
const webpack = require('webpack')

//增加hot: true
    devServer: {
        contentBase: './dist',
        open: true,
        hot: true
    },

//实例化new webpack.HotModuleReplacementPlugin()
    plugins: [
        new VueLoaderPlugin(),
        new HtmlWebpackPlugin({
            template: './index.html'
        }),
        new CleanWebpackPlugin(),
        new webpack.HotModuleReplacementPlugin()
    ],
重新运行npm run start,在页面新增加一个todo4. 更改App.vue,把blue改为red,查看,页面todo4依然存在,这就是模块热替换。
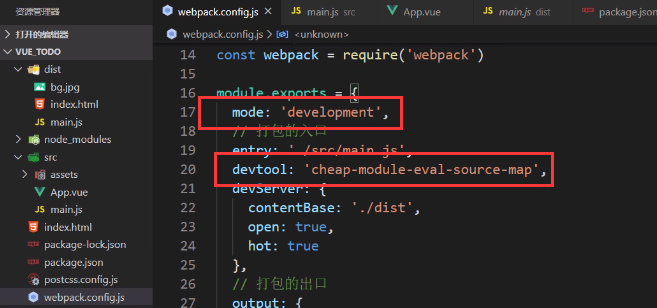
SourceMap 源代码映射
用于定位源代码错误位置
配置webpack.config.js,在module.exports中增加
    mode: 'production',
    devtool: 'eval',
也可以(development默认就是eval):
生产环境
webpack.dev.js :用于开发,专注于开发调试。 webpack.prod.js : 用于生产,构建更小的目标文件,改善加载时间
- 示例:
将原来的webpack.config.js改名为webpack.dev.js,复制一份改为webpack.prod.js
修改webpack.prod.js
//导入path模块

const path = require('path')

//引入vue-loader插件
const VueLoaderPlugin = require('vue-loader/lib/plugin')

const HtmlWebpackPlugin = require('html-webpack-plugin')

// 引入clean-webpack-plugin
const { CleanWebpackPlugin } = require('clean-webpack-plugin')

module.exports = {
    mode: 'production',
    //导出2个对象,
    //打包入口文件
    entry: './src/main.js',
    //打包的出口文件
    output:{
        filename: 'bundle.js',
        path: path.resolve(__dirname,'dist')   //path需要使用绝对路径,要引入node的path
    },
    //打包规则,以.vue结尾用vue-loader打包
    module: {
        rules: [{
            test: /\.vue$/,
            loader: 'vue-loader'
        },{
            test: /\.(jpg|jpeg|png|svg)$/,
            loader: 'url-loader',
            options: {
                name: '[name].[ext]',
                limit: 2048
            },
        },{
            test: /\.css$/,
            // 用多个loader注意loader顺序,用use关键字,
            //loader按照从右到左,从下到上执行
            use: ['style-loader','css-loader']
        },{
            test: /\.styl(us)?$/,
            use: ['style-loader','css-loader','postcss-loader','stylus-loader']
        }]
    },
    //插件
    plugins: [
        new VueLoaderPlugin(),
        new HtmlWebpackPlugin({
            template: './index.html'
        }),
        new CleanWebpackPlugin(),
    ],
    resolve: {
        alias: {
            'vue':'vue/dist/vue.js'
        }
    }
}
修改package.json,删除原来的脚本。
  "scripts": {
    "dev": "webpack-dev-server --config ./webpack.dev.js",
    "build": "webpack --config ./webpack.prod.js"
  },
测试npm run dev与npm run build 的效果。
webpack-merge 的使用
用于设置webpack的公共配置部分。
安装
npm install -D webpack-merge
创建build文件夹,将全面的webpack.prod.js和webpack.dev.js文件,移动到build文件夹,创建webpack.base.js文件
webpack.base.js
//导入path模块
const path = require('path')

//引入vue-loader插件
const VueLoaderPlugin = require('vue-loader/lib/plugin')

const HtmlWebpackPlugin = require('html-webpack-plugin')

// 引入clean-webpack-plugin
const { CleanWebpackPlugin } = require('clean-webpack-plugin')

//引入插件
const webpack = require('webpack')

module.exports = {

    //打包入口文件
    entry: './src/main.js',
    //打包的出口文件
    output:{
        filename: 'bundle.js',
        path: path.resolve(__dirname,'../dist')   //path需要使用绝对路径,要引入node的path
    },
    //打包规则,以.vue结尾用vue-loader打包
    module: {
        rules: [{
            test: /\.vue$/,
            loader: 'vue-loader'
        },{
            test: /\.(jpg|jpeg|png|svg)$/,
            loader: 'url-loader',
            options: {
                name: '[name].[ext]',
                limit: 2048
            },
        },{
            test: /\.css$/,
            // 用多个loader注意loader顺序,用use关键字,
            //loader按照从右到左,从下到上执行
            use: ['style-loader','css-loader']
        },{
            test: /\.styl(us)?$/,
            use: ['style-loader','css-loader','postcss-loader','stylus-loader']
        }]
    },
    //插件
    plugins: [
        new VueLoaderPlugin(),
        new HtmlWebpackPlugin({
            template: './index.html'
        }),
        new CleanWebpackPlugin(),
    ],
    resolve: {
        alias: {
            'vue':'vue/dist/vue.js'
        }
    }
}
webpack.dev.js
const baseConfig = require('./webpack.base.js')
const {merge} = require('webpack-merge')

//引入插件
const webpack = require('webpack')

const devConfig = {
    mode: 'development',
    //导出2个对象,
    devtool: 'eval',
    devServer: {
        contentBase: './dist',
        open: true,
        hot: true
    },
    //插件
    plugins: [
        new webpack.HotModuleReplacementPlugin()
    ],
}

module.exports = merge(baseConfig,devConfig)
webpack.prod.js
const baseConfig = require('./webpack.base.js')
const {merge} = require('webpack-merge')

const prodConfig = {
    mode: 'production',
}

module.exports =merge(baseConfig,prodConfig)
通过npm run dev 与 npm run build测试(注意script多一层build目录"dev": "webpack-dev-server --config ./build/webpack.dev.js")
babel 将es6 编译成es5语法
安装
npm install -D babel-loader @babel/core
修改webpack.base.js
    module: {
        rules: [{
            test: /\.js$/,
            exclude: /node_module/,
            loader: "babel-loader"
        },{
创建.babel.rc配置文件
{
    "presets": ["@babel/preset-env"]
}
在main.js增加以下2行用于调试: const arr = [1,2,3].map(item => item + 1) console.log(arr)
npm run dev,在浏览器中查看main.js的内容
VSCode 配置
settings.json(快捷键ctrl+shift+p,输入json ,点击Preferences: Open Settings (JSON))
{
    "terminal.integrated.shell.windows": "C:\\WINDOWS\\System32\\cmd.exe",
    "editor.tabSize": 2,
    "editor.formatOnSave": true,
    "files.autoSave": "onFocusChange",
    //stylus 不使用{}
    "stylusSupremacy.insertBraces": false,
    //stylus 不使用;
    "stylusSupremacy.insertSemicolons": false,
    //在style样式中缩进2个空格
    "vetur.format.styleInitialIndent": true,
    //在script样式中,缩进2个空格
    "vetur.format.scritpInitialIndent": true,
    "vetur.format.defaultFormatterOptions": {
        "prettier": {
            //适用单引号
            "singleQuote": true,
            //不适用;号
            "semi": false,
            "proseWrap": "nerver",
            "printWidth": 80,
        },
        "prettyhtml": {
            //超过80字符换行显示
            "printWidth": 80,
            // "singleQuote": false,
            // "wrapAttributes": false,
            // "sortAttributes": false
        }
    }
}
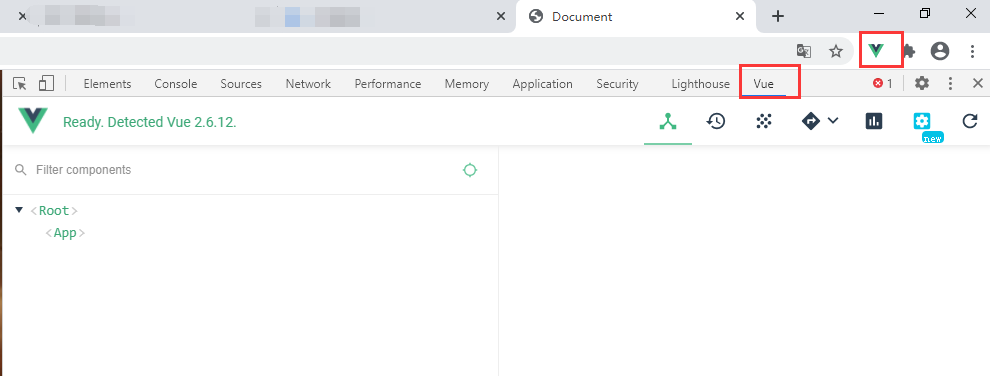
vue-devtools 浏览器扩展安装
C:\Users\Administrator>git clone https://github.com/vuejs/vue-devtools
Cloning into 'vue-devtools'...
remote: Enumerating objects: 32, done.
remote: Counting objects: 100% (32/32), done.
remote: Compressing objects: 100% (28/28), done.
remote: Total 9964 (delta 10), reused 14 (delta 4), pack-reused 9932 eceiving objects: 100% (9964/9964), 8.79 MiB | 2.02Receiving objects: 100% (9964/9964), 8.90 MiB | 1.9
2 MiB/s, done.
Resolving deltas: 100% (6549/6549), done.

C:\Users\Administrator>npm install -g yarn
C:\Users\Administrator\AppData\Roaming\npm\yarn -> C:\Users\Administrator\AppData\Roaming\npm\node_modules\yarn\bin\yarn.js
C:\Users\Administrator\AppData\Roaming\npm\yarnpkg -> C:\Users\Administrator\AppData\Roaming\npm\node_modules\yarn\bin\yarn.js
+ yarn@1.22.5
added 1 package in 1.656s

C:\Users\Administrator>yarn --version
1.22.5
#如果--version没反应,卸了重装一下试试。
C:\Users\Administrator>cd vue-devtools
C:\Users\Administrator\vue-devtools>yarn install
[1/5] Validating package.json...
[2/5] Resolving packages...
[3/5] Fetching packages...
info There appears to be trouble with your network connection. Retrying...
warning url-loader@1.1.2: Invalid bin field for "url-loader".
info fsevents@1.2.9: The platform "win32" is incompatible with this module.
info "fsevents@1.2.9" is an optional dependency and failed compatibility check. Excluding it from installation.
[4/5] Linking dependencies...
[5/5] Building fresh packages...
Done in 5285.52s.
C:\Users\Administrator\vue-devtools>npm run build
#修改vue-devtools\packages\shell-chrome\manifest.json 的"persistent": true
#复制shell-chrome到vue-devtools\shells\下,并重名令chrome(shells需要手动创建)
#在浏览器中--设置--扩展程序--开发者模式--加载已解压的扩展程序--选择到vue-devtools\shells\chrome目录
访问vue的站点:
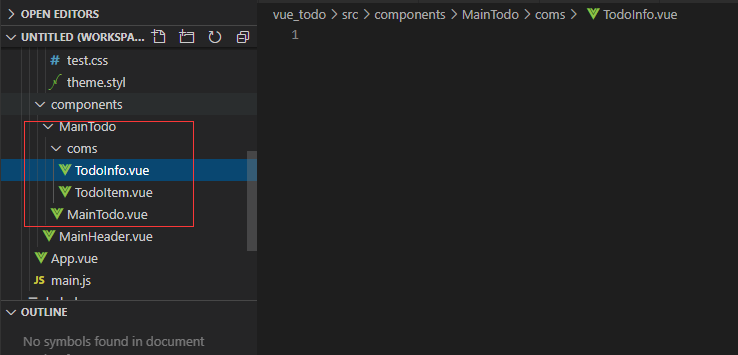
todo项目组件拆分
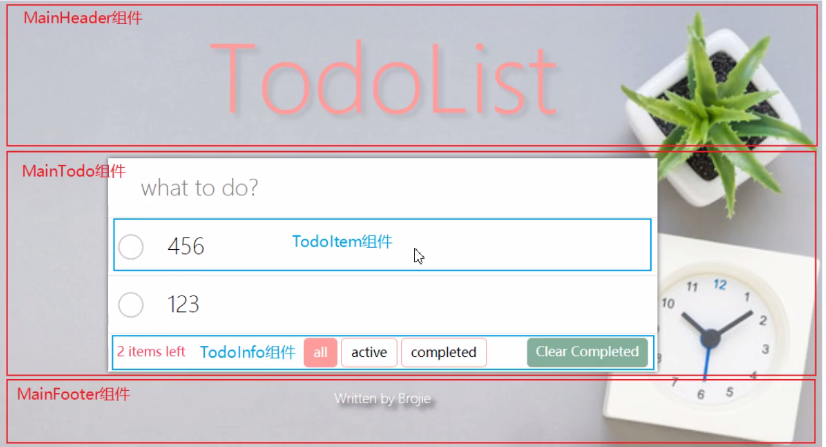 拆分为3个组件
- MainHeader组件
- MainTodo组件
- TodoItem组件
- TodoInfo组件
- MainFooter组件
拆分为3个组件
- MainHeader组件
- MainTodo组件
- TodoItem组件
- TodoInfo组件
- MainFooter组件
Mainheader组件
main.js
//创建vue根实例
import Vue from 'vue'
//导入App组件
import App from './App.vue'

//创建vue根实例
new Vue({
    el: '#app',
    //局部组建挂载
    components: {
        // 组件名:组件对象(对象通过App.vue导入)
        App: App
    },
    template: '<App/>'
})
App.vue
<template>
  <div>
    <main-header></main-header>
  </div>
</template>

<script>
import './assets/styles/global.styl'

import MainHeader from './components/MainHeader.vue'

export default {
    name: 'App',
    components: {
        //组件名:组件对象,驼峰写法在template中转换为小写
        MainHeader: MainHeader
    }
}
</script>

<style lang="stylus" scoped></style>
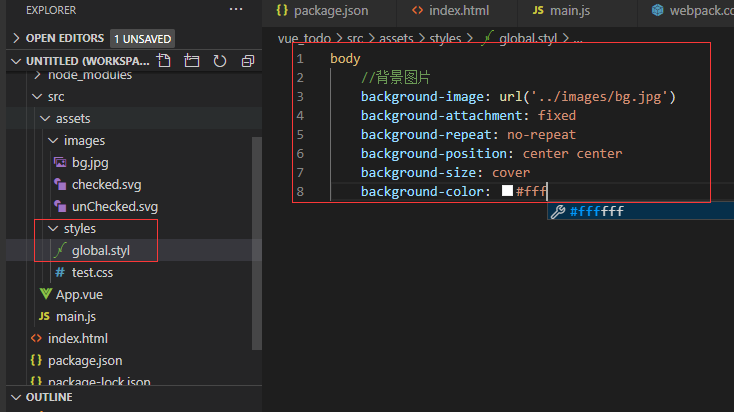
src/assets/styles/global.styl
*
    margin: 0
    padding: 0

body
    // 背景图片
    background-image: url('../images/bg.jpg')
    background-attachment: fixed
    background-repeat: no-repeat
    background-position: center center
    background-size: cover
    background-color: #fff
    font: 14px 'microsoft yehei'
    font-weight: 300
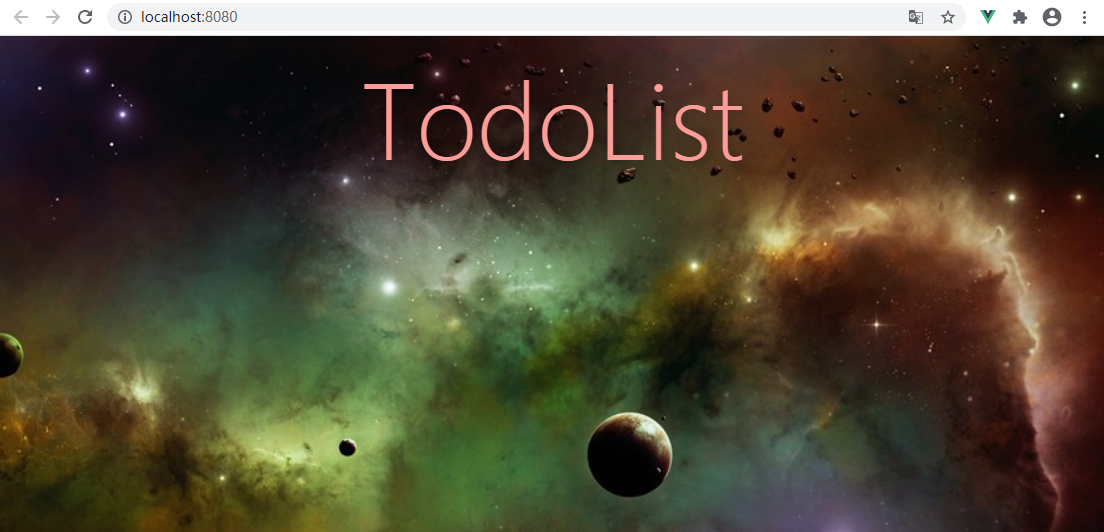
src/components/MainHeader.vue (components目录和MainHeader.vue需要创建)
<template>
  <header class="main-header">
    <h1>TodoList</h1>
  </header>
</template>

<script>
export default {
  name: "MainHeader"
}
</script>

<style lang="stylus" scoped>
  .main-header
    text-align: center

    h1
      margin: 20px
      font-size: 100px
      font-weight: 100
      color: rgb(252, 157, 154)
      text-shadow: 5px 5px 5px rgba(0, 0, 0, 0.1)
</style>
运行npm run dev查看浏览器效果
优化
css 模块化,将常用的配置集中化,创建src/assets/styles/theme.styl
$red = rgb(254, 67, 101)
$lightred = rgb(252, 157, 154)
$yellow = rgb(249, 205, 173)
$green = rgb(131, 175, 155)
$lightgreen = rgb(200, 200, 169)
修改MainHeader.vue,通过@import导入,通过$lightred引用定义,这里的@是webpack的别名('@': path.resolve(__dirname, '../src'))
<style lang="stylus" scoped>
  @import '../assets/styles/theme.styl'

  .main-header
    text-align: center

    h1
      margin: 20px
      font-size: 100px
      font-weight: 100
      color: $lightred
      text-shadow: 5px 5px 5px rgba(0, 0, 0, 0.1)
</style>
在wenpack中设置别名
修改build/webpack.base.js
    resolve: {
        alias: {
            'vue': 'vue/dist/vue.js',
            '@': path.resolve(__dirname, '../src'),
            'style': path.resolve(__dirname, '../src/assets/styles')

        }
    }
修改MainHeader.vue,重新启动npm run dev,查看浏览器效果相同
<style lang="stylus" scoped>
  @import '~style/theme.styl'

  .main-header
    text-align: center

    h1
      margin: 20px
      font-size: 100px
      font-weight: 100
      color: $lightred
      text-shadow: 5px 5px 5px rgba(0, 0, 0, 0.1)
</style>
MainTodo
创建目录与组件文件
编辑MainTodo.vue
<template>
  <div>
    <input type="text" />
  </div>
</template>

<script>
export default {
  name: 'MainTodo'
}
</script>

<style lang="stylus" scoped></style>
编辑App.vue
<template>
  <div>
    <main-header></main-header>
    <main-todo></main-todo>
  </div>
</template>

<script>
import './assets/styles/global.styl'

import MainHeader from './components/MainHeader.vue'
import MainTodo from './components/MainTodo/MainTodo.vue'

export default {
    name: 'App',
    components: {
        //组件名:组件对象,驼峰写法在template中转换为小写
        MainHeader: MainHeader,
        MainTodo: MainTodo
    }
}
</script>

<style lang="stylus" scoped></style>
MainTodo样式,设置class与样式
修改MainTodo.vue
<template>
  <div class="main-todo">
    <input type="text" class="add-todo" placeholder="what to do?" autofocus />
  </div>
</template>


<script>
export default {
  name: 'MainTodo'
}
</script>

<style lang="stylus" scoped>
  .main-todo
    margin: 0 auto
    width: 600px
    background-color: #fff
    box-shadow: 0 0 5px #666

    .add-todo
      padding: 16px 16px 16px 36px
      width: 100%
      font-size: 24px
      font-font-weight: inherit
      font-font-family: inherit
      color: inherit
      border: none
      outline: none
      box-sizing: border-box
</style>
### TodoItem 实现

编写TodoItem.vue

```shell
<template>
  <div>
    <input type="checkbox" />
    <label>todo1</label>
    <button></button>
  </div>
</template>

<script>
export default {
  name: 'TodoItem'
}
</script>

<style lang="stylus" scoped></style>
在MainTodo.vue中导入子组件TodoItem
<template>
  <div class="main-todo">
    <input type="text" class="add-todo" placeholder="what to do?" autofocus />
    <todo-item></todo-item>
  </div>
</template>


<script>
import TodoItem from './coms/TodoItem.vue'
export default {
  name: 'MainTodo',
  components: {
    TodoItem
  }
}
</script>

<style lang="stylus" scoped>
  .main-todo
    margin: 0 auto
    width: 600px
    background-color: #fff
    box-shadow: 0 0 5px #666

    .add-todo
      padding: 16px 16px 16px 36px
      width: 100%
      font-size: 24px
      font-font-weight: inherit
      font-font-family: inherit
      color: inherit
      border: none
      outline: none
      box-sizing: border-box
</style>
TodoItem样式
在webpack.base.js设置别名:
    resolve: {
        alias: {
            'vue': 'vue/dist/vue.js',
            '@': path.resolve(__dirname, '../src'),
            'style': path.resolve(__dirname, '../src/assets/styles'),
            'images': path.resolve(__dirname, '../src/assets/images')
        }
    }
定义css公共函数,此函数清除默认样式
编辑TodoItem.vue
<template>
  <div class="todo-item">
    <input type="checkbox" />
    <label>todo1</label>
    <button></button>
  </div>
</template>


<script>
export default {
  name: 'TodoItem'
}
</script>


<style lang="stylus" scoped>
  @import '~style/theme.styl'
  @import '~style/mixins.styl'

  .todo-item
    display: flex
    justify-content: space-between
    padding: 10px
    font-size: 24px

    &:hover
      button:after
        content: 'x'
        font-size: 24px
        color: $lightred

    &.completed
      color: #d9d9d9
      text-decoration: line-through

    input
      width: 50px
      height: 30px
      text-align: center
      cleanDfaultStyle()

      &:after
        content: url('~images/unchecked.svg')

      &:checked:after
        content: url('~images/checked.svg')

    label
      flex: 1
      transition: color 0.5s

    button
      width: 40px
      cleanDfaultStyle()
      background-color: transparent
      cursor: pointer
</style>
TodoItem 组件业务实现
- 添加功能
- 选中功能
- 删除功能
核心:父组件向子组件传值
添加功能:
MainHeader.vue
<template>
  <div class="main-todo">
    <input
      type="text"
      class="add-todo"
      placeholder="what to do?"
      autofocus
      v-model="content"
      @keyup.enter="addTodo"
    />
    <todo-item v-for="(item, index) in todoData" :key="index" :todo="item"></todo-item>
  </div>
</template>

<script>
import TodoItem from './coms/TodoItem.vue'

let id = 0
export default {
  name: 'MainTodo',
  data() {
    return {
      todoData: [],
      content:''
    }
  },
  methods:{
    addTodo(){
      if (this.content === '' ) return
      this.todoData.unshift({
        id:id++,
        content: this.content,
        completed: false
      })
      this.content=''
    }
  },
  components: {
    TodoItem
  }
}
</script>

<style lang="stylus" scoped>
  .main-todo
    margin: 0 auto
    width: 600px
    background-color: #fff
    box-shadow: 0 0 5px #666

    .add-todo
      padding: 16px 16px 16px 36px
      width: 100%
      font-size: 24px
      font-font-weight: inherit
      font-font-family: inherit
      color: inherit
      border: none
      outline: none
      box-sizing: border-box
</style>
Todoitem.vue
<template>
  <div class="todo-item">
    <input type="checkbox" />
    <label>{{todo.content}}</label>
    <button></button>
  </div>
</template>

<script>
export default {
  name: 'TodoItem',
  props:{
    todo:Object
  }
}
</script>

<style lang="stylus" scoped>
  @import '~style/theme.styl'
  @import '~style/mixins.styl'

  .todo-item
    display: flex
    justify-content: space-between
    padding: 10px
    font-size: 24px
    border-top: 1px solid rgba(0, 0, 0, 0.1)

    &:hover
      button:after
        content: 'x'
        font-size: 24px
        color: $lightred

    &.completed
      color: #d9d9d9
      text-decoration: line-through

    input
      width: 50px
      height: 30px
      text-align: center
      cleanDfaultStyle()

      &:after
        content: url('~images/unchecked.svg')

      &:checked:after
        content: url('~images/checked.svg')

    label
      flex: 1
      transition: color 0.5s

    button
      width: 40px
      cleanDfaultStyle()
      background-color: transparent
      cursor: pointer
</style>
选中功能,核心点--样式绑定
TodoItem.vue
<template>
  <div :class="['todo-item',todo.completed ? 'completed': '']">
    <input type="checkbox" v-model="todo.completed" />
    <label>{{todo.content}}</label>
    <button></button>
  </div>
</template>


<script>
export default {
  name: 'TodoItem',
  props:{
    todo:Object
  }
}
</script>


<style lang="stylus" scoped>
  @import '~style/theme.styl'
  @import '~style/mixins.styl'

  .todo-item
    display: flex
    justify-content: space-between
    padding: 10px
    font-size: 24px
    border-top: 1px solid rgba(0, 0, 0, 0.1)

    &:hover
      button:after
        content: 'x'
        font-size: 24px
        color: $lightred

    &.completed
      color: #d9d9d9
      text-decoration: line-through

    input
      width: 50px
      height: 30px
      text-align: center
      cleanDfaultStyle()

      &:after
        content: url('~images/unchecked.svg')

      &:checked:after
        content: url('~images/checked.svg')

    label
      flex: 1
      transition: color 0.5s

    button
      width: 40px
      cleanDfaultStyle()
      background-color: transparent
      cursor: pointer
</style>
删除功能 , 核心点子组件向父组件传值
TodoItem.vue
<template>
  <div :class="['todo-item',todo.completed ? 'completed': '']">
    <input type="checkbox" v-model="todo.completed" />
    <label>{{todo.content}}</label>
    <button @click="delItem"></button>
  </div>
</template>


<script>
export default {
  name: 'TodoItem',
  props:{
    todo:Object
  },
  methods: {
    delItem(){
      this.$emit('del',this.todo.id)
    }
  }
}
</script>


<style lang="stylus" scoped>
  @import '~style/theme.styl'
  @import '~style/mixins.styl'

  .todo-item
    display: flex
    justify-content: space-between
    padding: 10px
    font-size: 24px
    border-top: 1px solid rgba(0, 0, 0, 0.1)

    &:hover
      button:after
        content: 'x'
        font-size: 24px
        color: $lightred

    &.completed
      color: #d9d9d9
      text-decoration: line-through

    input
      width: 50px
      height: 30px
      text-align: center
      cleanDfaultStyle()

      &:after
        content: url('~images/unchecked.svg')

      &:checked:after
        content: url('~images/checked.svg')

    label
      flex: 1
      transition: color 0.5s

    button
      width: 40px
      cleanDfaultStyle()
      background-color: transparent
      cursor: pointer
</style>
MainTodo.vue
<template>
  <div class="main-todo">
    <input
      type="text"
      class="add-todo"
      placeholder="what to do?"
      autofocus
      v-model="content"
      @keyup.enter="addTodo"
    />
    <todo-item
      v-for="(item, index) in todoData"
      :key="index"
      :todo="item"
      @del="handleDelete"
    ></todo-item>
  </div>
</template>


<script>
import TodoItem from './coms/TodoItem.vue'

let id = 0
export default {
  name: 'MainTodo',
  data() {
    return {
      todoData: [],
      content:''
    }
  },
  methods:{
    addTodo(){
      if (this.content === '' ) return
      this.todoData.unshift({
        id:id++,
        content: this.content,
        completed: false
      })
      this.content=''

    },
    handleDelete(id){
      this.todoData.splice(this.todoData.findIndex(item => item.id=== id),1)
    }
  },
  components: {
    TodoItem
  }
}
</script>

<style lang="stylus" scoped>
  .main-todo
    margin: 0 auto
    width: 600px
    background-color: #fff
    box-shadow: 0 0 5px #666

    .add-todo
      padding: 16px 16px 16px 36px
      width: 100%
      font-size: 24px
      font-font-weight: inherit
      font-font-family: inherit
      color: inherit
      border: none
      outline: none
      box-sizing: border-box
</style>
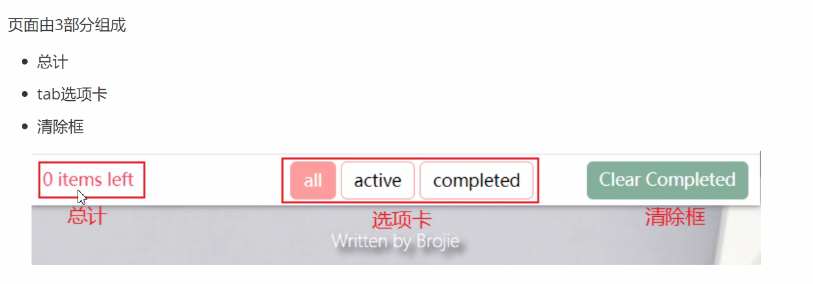
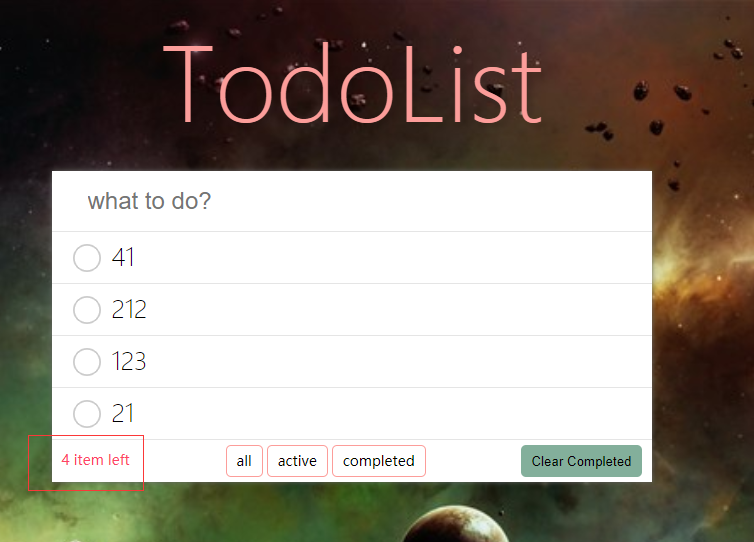
TodoInfo 组件实现
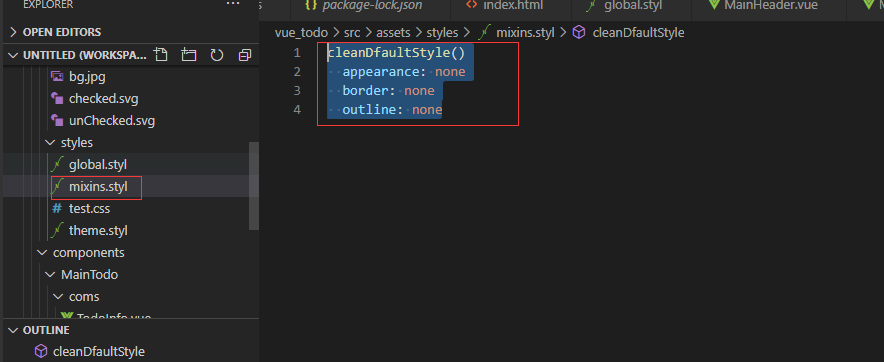
修改mixins.styl
cleanDfaultStyle()
  appearance: none
  border: none
  outline: none

btn(c, border = false)
  padding: 0 10px
  border-radius: 5px
  cursor: pointer
  cleanDfaultStyle()

  if (border == true)
    border: 1px solid c
  else
    background-color: c
    coler: #fff

primaryBtn()
  btn(rgb(252, 157, 154))

primaryBorderBtn()
  btn(rgb(252, 157, 154), true)

infoBtn()
  btn(rgb(131, 175, 155))
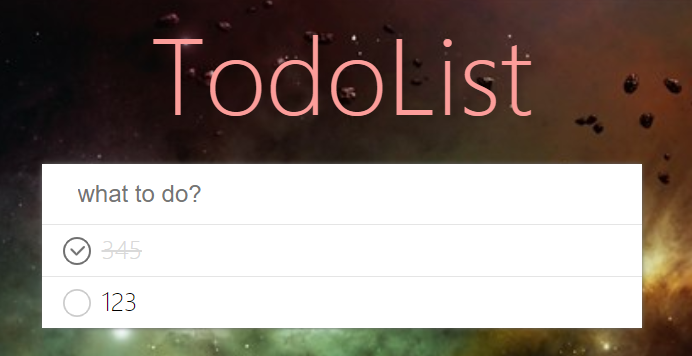
修改TodoInfo.vue
<template>
  <div class="todo-info">
    <span class="total">1 item left</span>
    <div class="tabs">
      <a
        class="btn primary border"
        v-for="(item, index) in states "
        :key="index"
      >{{item}}</a>
    </div>
    <button class="btn info">Clear Completed</button>
  </div>
</template>

<script>
export default {
  name: 'TodoInfo',
  data(){
    return {
      states : ['all', 'active', 'completed']
    }
  },
}
</script>


<style lang="stylus" scoped>
  @import '~style/theme.styl'
  @import '~style/mixins.styl'

  .todo-info
    display: flex
    justify-content: space-between
    font-weight: 400
    padding: 5px 10px
    line-height: 30px
    border-top: 1px solid rgba(0, 0, 0, 0.1)

    .total
      color: $red

    .tabs
      display: flex
      justify-content: space-between
      width: 200px

    .btn.primary.border
      primaryBorderBtn()

      &.actived
        primaryBtn()

    .btn.info
      infoBtn()
</style>
修改MainTodo.vue
<template>
  <div class="main-todo">
    <input
      type="text"
      class="add-todo"
      placeholder="what to do?"
      autofocus
      v-model="content"
      @keyup.enter="addTodo"
    />
    <todo-item
      v-for="(item, index) in todoData"
      :key="index"
      :todo="item"
      @del="handleDelete"
    ></todo-item>
    <todo-info></todo-info>
  </div>
</template>


<script>
import TodoItem from './coms/TodoItem.vue'
import TodoInfo from './coms/TodoInfo.vue'

let id = 0
export default {
  name: 'MainTodo',
  data() {
    return {
      todoData: [],
      content:''
    }
  },
  methods:{
    addTodo(){
      if (this.content === '' ) return
      this.todoData.unshift({
        id:id++,
        content: this.content,
        completed: false
      })
      this.content=''

    },
    handleDelete(id){
      this.todoData.splice(this.todoData.findIndex(item => item.id=== id),1)
    }
  },
  components: {
    TodoItem,
    TodoInfo
  }
}
</script>

<style lang="stylus" scoped>
  .main-todo
    margin: 0 auto
    width: 600px
    background-color: #fff
    box-shadow: 0 0 5px #666

    .add-todo
      padding: 16px 16px 16px 36px
      width: 100%
      font-size: 24px
      font-font-weight: inherit
      font-font-family: inherit
      color: inherit
      border: none
      outline: none
      box-sizing: border-box
</style>
TodoInfo 业务
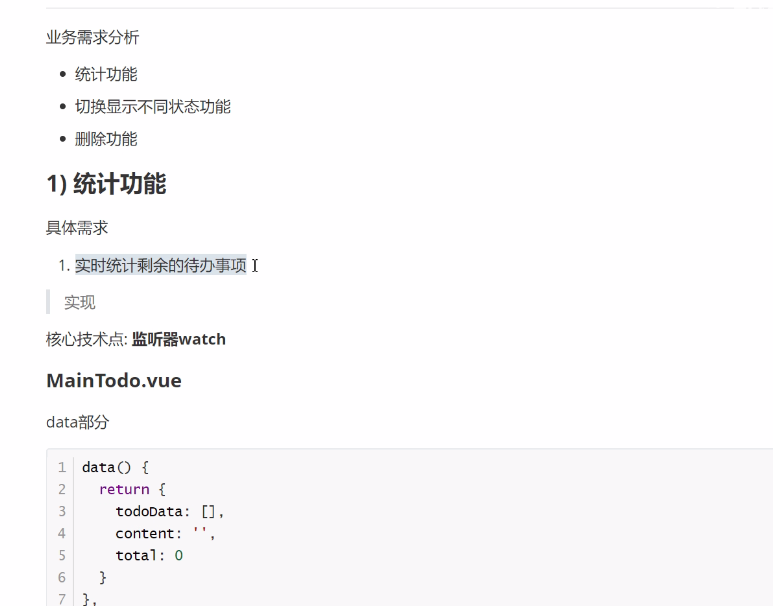
统计功能: watch监听
MainTodo.vue
<template>
  <div class="main-todo">
    <input
      type="text"
      class="add-todo"
      placeholder="what to do?"
      autofocus
      v-model="content"
      @keyup.enter="addTodo"
    />
    <todo-item
      v-for="(item, index) in todoData"
      :key="index"
      :todo="item"
      @del="handleDelete"
    ></todo-item>
    <todo-info :total="total"></todo-info>
  </div>
</template>


<script>
import TodoItem from './coms/TodoItem.vue'
import TodoInfo from './coms/TodoInfo.vue'

let id = 0
export default {
  name: 'MainTodo',
  data() {
    return {
      todoData: [],
      content:'',
      total: 0
    }
  },
  watch: {
    todoData: {
      deep: true,
      handler(){
        this.total = this.todoData.filter(item => item.completed == false).length
      }
    }
  },
  methods:{
    addTodo(){
      if (this.content === '' ) return
      this.todoData.unshift({
        id:id++,
        content: this.content,
        completed: false
      })
      this.content=''

    },
    handleDelete(id){
      this.todoData.splice(this.todoData.findIndex(item => item.id=== id),1)
    }
  },
  components: {
    TodoItem,
    TodoInfo
  }
}
</script>
TodoInfo.vue
<template>
  <div class="todo-info">
    <span class="total">{{total}} item left</span>
    <div class="tabs">
      <a
        class="btn primary border"
        v-for="(item, index) in states "
        :key="index"
      >{{item}}</a>
    </div>
    <button class="btn info">Clear Completed</button>
  </div>
</template>

<script>
export default {
  name: 'TodoInfo',
  props: {
    total: Number
  },
  data(){
    return {
      states : ['all', 'active', 'completed']
    }
  },
}
</script>
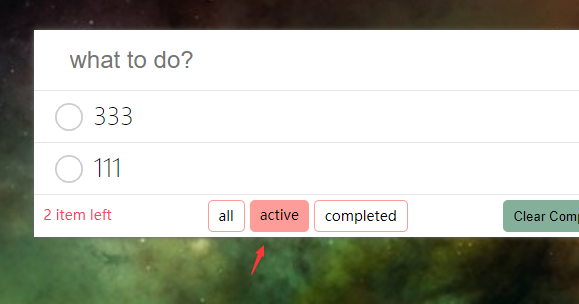
切换显示功能
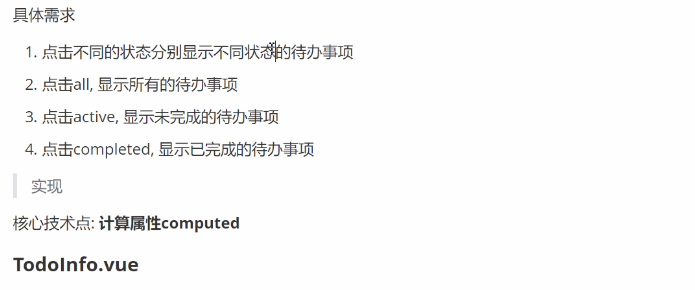
TodoInfo.vue
<template>
  <div class="todo-info">
    <span class="total">{{total}} item left</span>
    <div class="tabs">
      <a
        :class="['btn','primary', 'border', state == item? 'actived':'']"
        v-for="(item, index) in states "
        :key="index"
        @click="toggleState(item)"
      >{{item}}</a>
    </div>
    <button class="btn info">Clear Completed</button>
  </div>
</template>

<script>
export default {
  name: 'TodoInfo',
  props: {
    total: Number
  },
  data(){
    return {
      states : ['all', 'active', 'completed'],
      state: 'all'
    }
  },
  methods: {
    toggleState(state){
      this.state = state
    }
  }
}
</script>
改变父组件的显示
TodoInfo.vue
<template>
  <div class="todo-info">
    <span class="total">{{total}} item left</span>
    <div class="tabs">
      <a
        :class="['btn','primary', 'border', state == item? 'actived':'']"
        v-for="(item, index) in states "
        :key="index"
        @click="toggleState(item)"
      >{{item}}</a>
    </div>
    <button class="btn info">Clear Completed</button>
  </div>
</template>

<script>
export default {
  name: 'TodoInfo',
  props: {
    total: Number
  },
  data(){
    return {
      states : ['all', 'active', 'completed'],
      state: 'all'
    }
  },
  methods: {
    toggleState(state){
      this.state = state
      this.$emit('toggleState',state)
    }
  }
}
</script>
MainTodo.vue
<template>
  <div class="main-todo">
    <input
      type="text"
      class="add-todo"
      placeholder="what to do?"
      autofocus
      v-model="content"
      @keyup.enter="addTodo"
    />
    <todo-item
      v-for="(item, index) in filterData"
      :key="index"
      :todo="item"
      @del="handleDelete"
    ></todo-item>
    <todo-info :total="total" @toggleState="handlerToggleState"></todo-info>
  </div>
</template>


<script>
import TodoItem from './coms/TodoItem.vue'
import TodoInfo from './coms/TodoInfo.vue'

let id = 0
export default {
  name: 'MainTodo',
  data() {
    return {
      todoData: [],
      content:'',
      total: 0,
      filter: 'all'
    }
  },
  watch: {
    todoData: {
      deep: true,
      handler(){
        this.total = this.todoData.filter(item => item.completed == false).length
      }
    }
  },
  methods:{
    addTodo(){
      if (this.content === '' ) return
      this.todoData.unshift({
        id:id++,
        content: this.content,
        completed: false
      })
      this.content=''

    },
    handleDelete(id){
      this.todoData.splice(this.todoData.findIndex(item => item.id=== id),1)
    },
    handlerToggleState(state){
      this.filter = state
    }
  },
  computed:{
    filterData(){
      switch(this.filter){
        case 'all':
          return this.todoData
          break
        case 'active':
          return this.todoData.filter(item => item.completed == false)
          break
        case 'completed':
          return this.todoData.filter(item => item.completed == true)
          break
      }
    }
  },
  components: {
    TodoItem,
    TodoInfo
  }
}
</script>

删除功能,点击clear completed,删除所有已经完成的待办事项。
TodoInfo.vue
<template>
  <div :class="['todo-item',todo.completed ? 'completed': '']">
    <input type="checkbox" v-model="todo.completed" />
    <label>{{todo.content}}</label>
    <button @click="delItem"></button>
  </div>
</template>

<script>
export default {
  name: 'TodoItem',
  props:{
    todo:Object
  },
  methods: {
    delItem(){
      this.$emit('del',this.todo.id)
    }
  }
}
</script>
MainTodo.vue
<template>
  <div class="main-todo">
    <input
      type="text"
      class="add-todo"
      placeholder="what to do?"
      autofocus
      v-model="content"
      @keyup.enter="addTodo"
    />
    <todo-item
      v-for="(item, index) in filterData"
      :key="index"
      :todo="item"
      @del="handleDelete"
    ></todo-item>
    <todo-info
      :total="total"
      @toggleState="handlerToggleState"
      @clearCompleted="handlerClear"
    ></todo-info>
  </div>
</template>


<script>
import TodoItem from './coms/TodoItem.vue'
import TodoInfo from './coms/TodoInfo.vue'

let id = 0
export default {
  name: 'MainTodo',
  data() {
    return {
      todoData: [],
      content:'',
      total: 0,
      filter: 'all'
    }
  },
  watch: {
    todoData: {
      deep: true,
      handler(){
        this.total = this.todoData.filter(item => item.completed == false).length
      }
    }
  },
  methods:{
    addTodo(){
      if (this.content === '' ) return
      this.todoData.unshift({
        id:id++,
        content: this.content,
        completed: false
      })
      this.content=''

    },
    handleDelete(id){
      this.todoData.splice(this.todoData.findIndex(item => item.id=== id),1)
    },
    handlerToggleState(state){
      this.filter = state
    },
    handlerClear(){
      this.todoData = this.todoData.filter(item => item.completed == false)
    }
  },
  computed:{
    filterData(){
      switch(this.filter){
        case 'all':
          return this.todoData
          break
        case 'active':
          return this.todoData.filter(item => item.completed == false)
          break
        case 'completed':
          return this.todoData.filter(item => item.completed == true)
          break
      }
    }
  },
  components: {
    TodoItem,
    TodoInfo
  }
}
</script>
MainFooter组件
编辑components/MainFooter.vue
<template>
  <footer class="main-footer">Written By T</footer>
</template>

<style lang="stylus" scoped>
  .main-footer
    margin-top: 20px
    text-align: center
    color: #fff
    text-shadow: 5px 5px 5px #000
</style>
编辑App.vue文件
<template>
  <div>
    <main-header></main-header>
    <main-todo></main-todo>
    <main-footer></main-footer>
  </div>
</template>

<script>
import './assets/styles/global.styl'

import MainHeader from './components/MainHeader.vue'
import MainTodo from './components/MainTodo/MainTodo.vue'
import MainFooter from './components/MainFooter.vue'

export default {
    name: 'App',
    components: {
        //组件名:组件对象,驼峰写法在template中转换为小写
        MainHeader: MainHeader,
        MainTodo: MainTodo,
        MainFooter
    }
}
</script>

<style lang="stylus" scoped></style>
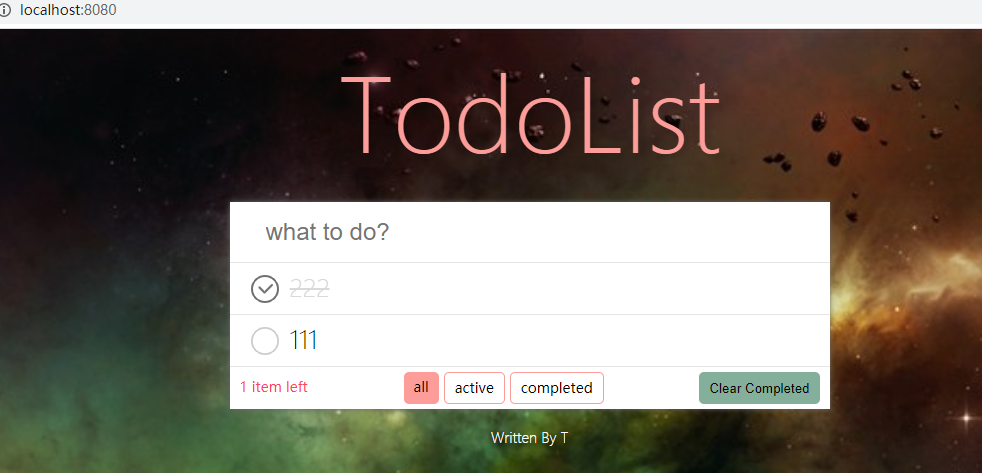
至此项目完成。