django 第三方 社会化登陆
访问量:2486
创建时间:2020-02-10
本案例在上一章节基础上实现。实现功能,访问需要登陆的网页是跳转到github进行认证。通过SOCIAL_AUTH_PIPELINE设置登陆后不关联django超级用户。
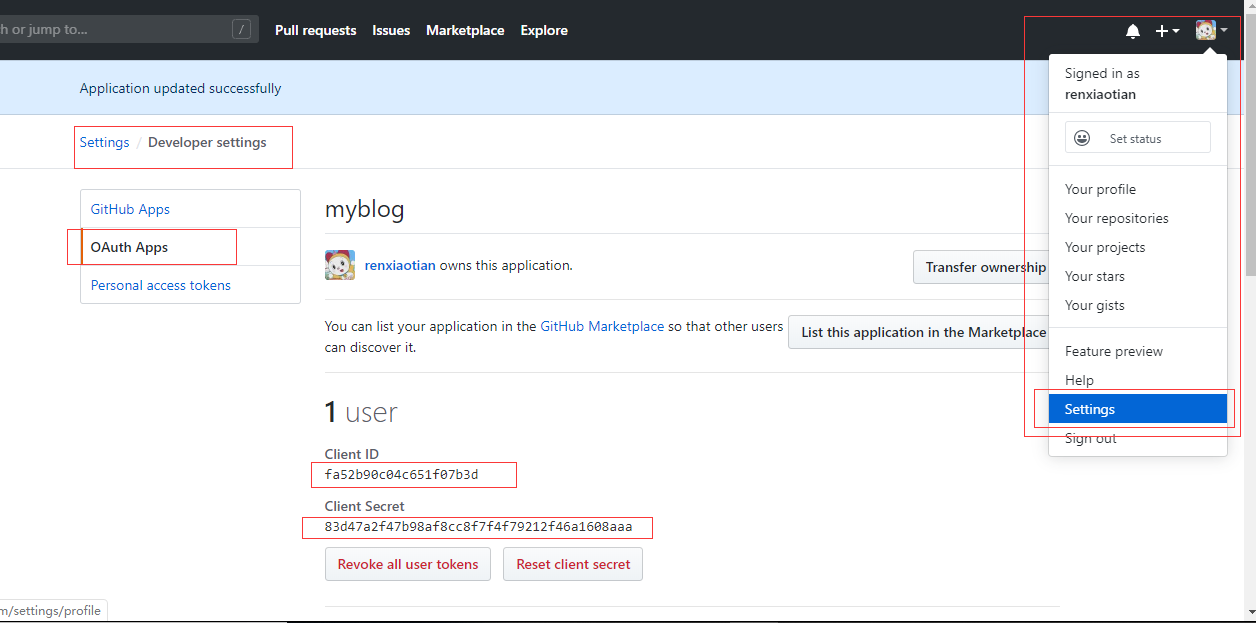
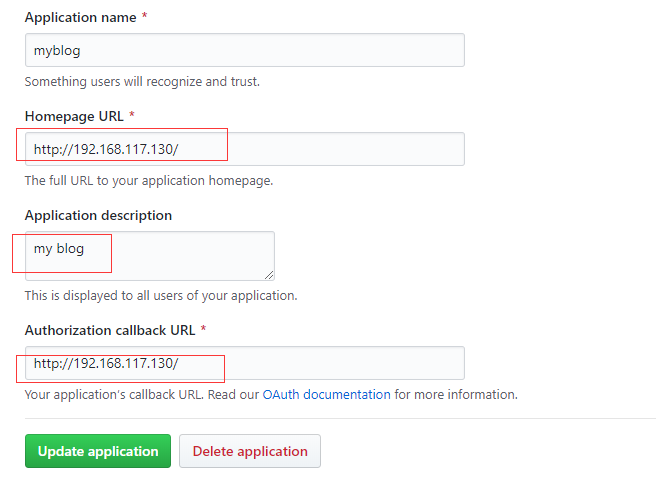
配置github
配置的部分内容需要在django项目中使用
安装第三方登陆模块
[root@localhost mysite]# pip3 install social-auth-app-django
配置settings.py
[root@localhost mysite]# vim mysite/settings.py
INSTALLED_APPS = [
    'django.contrib.admin',
    'django.contrib.auth',
    'django.contrib.contenttypes',
    'django.contrib.sessions',
    'django.contrib.messages',
    'django.contrib.staticfiles',
    'myapp',
    'social_django',
]
#github第三方登陆
AUTHENTICATION_BACKENDS = (
    'social_core.backends.github.GithubOAuth2',
    'django.contrib.auth.backends.ModelBackend',
)
SOCIAL_AUTH_URL_NAMESPACE = 'social'

# 填写Github中获取到的KEY和SECRET
SOCIAL_AUTH_GITHUB_KEY = 'fa52b90c0xxxxxx'   #<--github中的内容
SOCIAL_AUTH_GITHUB_SECRET = '83d47a2f47b98afxxxxxxxxxxxxxxxxxxxxxx'  #<--github中的内容
SOCIAL_AUTH_GITHUB_USE_OPENID_AS_USERNAME = True

# 登陆成功后的回调路由
SOCIAL_AUTH_LOGIN_REDIRECT_URL = '/'

SOCIAL_AUTH_PIPELINE = (
    'social_core.pipeline.social_auth.social_details',
    'social_core.pipeline.social_auth.social_uid',
    'social_core.pipeline.social_auth.auth_allowed',
    'social_core.pipeline.social_auth.social_user',
    'social_core.pipeline.user.get_username',
    'social_core.pipeline.user.create_user',
    'social_core.pipeline.social_auth.associate_user',
    'social_core.pipeline.social_auth.load_extra_data',
    'social_core.pipeline.user.user_details',
)
TEMPLATES = [
    {
        'BACKEND': 'django.template.backends.django.DjangoTemplates',
        'DIRS': [os.path.join(BASE_DIR, 'templates')],
        'APP_DIRS': True,
        'OPTIONS': {
            'context_processors': [
                'django.template.context_processors.debug',
                'django.template.context_processors.request',
                'django.contrib.auth.context_processors.auth',
                'django.contrib.messages.context_processors.messages',
                'social_django.context_processors.backends',   #<--新增
                'social_django.context_processors.login_redirect',  #<--新增
            ],
        },
    },
]
创建数据库
[root@localhost mysite]# python3 manage.py migrate
配置urls.py
[root@localhost mysite]# vim mysite/urls.py

from django.contrib import admin
from django.urls import path, include
from mysite.views import index
urlpatterns = [
    path('myapp/',include('myapp.urls')),
    path('admin/', admin.site.urls),
    path('', index),
    path('', include('social_django.urls', namespace='social'))
]
修改登陆模板
[root@localhost mysite]# vim templates/myapp_login.html
<!DOCTYPE html>
<html>
<head>
  <title>django</title>
</head>
<body>
<a href="{% url 'social:begin' 'github' %}">Github登陆</a>
</body>
</html>
运行浏览器后访问网站主页,跳转到登陆页面。
生产环境nginx代理
注意在nginx配置文件中设置proxy_set_header这三行,使域名传递给django:
        location / {
            proxy_set_header  Host  $host;
            proxy_set_header  X-real-ip $remote_addr;
            proxy_set_header  X-Forwarded-For $proxy_add_x_forwarded_for;
            proxy_pass http://127.0.0.1:8000;
        }
django的settings配置文件中添加:
USE_X_FORWARDED_HOST = True
否则django使用github登陆的redirect_uri=https://127.0.0.1:8001/social-auth/complete/ 总是报:GET /?error=redirect_uri_mismatch&error_description=The+redirect_uri+MUST+match+the+registered+callback+URL+for+this+application.&error_uri=https%3A%2F%2Fdeveloper.github.com%2Fapps%2Fmanaging-oauth-apps%2Ftroubleshooting-authorization-request-errors%2F%23redirect-uri-mismatch&state=rw9HCmBPTcU2QT3RvyIH3dhbNVxOporx
导致无法认证(其他程序java等也是同样原理)
登陆评论:
使用GITHUB登陆