Telegraf 1.17 & InfluxDB 2.0.4 安装使用
访问量:3817
创建时间:2021-02-25
telegraf 安装
Telegraf 是一个用 Go 编写的代理程序,可收集系统和服务的统计数据,并写入到 InfluxDB 数据库。内存占用小,通过插件系统可轻松添加支持其他服务的扩展。
Ubuntu & Debian
wget https://dl.influxdata.com/telegraf/releases/telegraf_1.17.3-1_amd64.deb
sudo dpkg -i telegraf_1.17.3-1_amd64.deb
RedHat & CentOS
wget https://dl.influxdata.com/telegraf/releases/telegraf-1.17.3-1.x86_64.rpm
sudo yum localinstall telegraf-1.17.3-1.x86_64.rpm
#配置文件路径/etc/telegraf/telegraf.conf
windows
wget https://dl.influxdata.com/telegraf/releases/telegraf-1.17.3_windows_amd64.zip
unzip telegraf-1.17.3_windows_amd64.zip
linux 二进制64位
wget https://dl.influxdata.com/telegraf/releases/telegraf-1.17.3_linux_amd64.tar.gz
tar xf telegraf-1.17.3_linux_amd64.tar.gz
- 这里测试在centos7上安装
InfluxDB 2.0.4 安装
Ubuntu & Debian
https://dl.influxdata.com/influxdb/releases/influxdb2-2.0.4-amd64.deb
sudo dpkg -i influxdb2-2.0.4-amd64.deb
RedHat & CentOS
https://dl.influxdata.com/influxdb/releases/influxdb2-2.0.4.x86_64.rpm
sudo yum localinstall influxdb2-2.0.4.x86_64.rpm
#启动
systemctl start influxdb
systemctl enable influxdb
systemctl status influxdb
linux 二进制64位
https://dl.influxdata.com/influxdb/releases/influxdb2-2.0.4-linux-amd64.tar.gz
tar xvfz influxdb2-2.0.4-linux-amd64.tar.gz
- 本文测试使用centos安装,默认端口监听端口8086
初始化influx,nfluxDB的初始设置过程包括创建默认组织,用户,存储桶和Admin身份验证令牌。InfluxDB用户界面(UI)和influx命令行界面(CLI)均可使用设置过程。
[root@cephadm ~]# influx setup
#输入主要用户名。
Please type your primary username: root
#输入您的用户密码。
Please type your password:
#再次输入以确认密码。
Please type your password again:
#输入主要组织的名称。
Please type your primary organization name: InfluxData
#输入主要存储桶的名称。
Please type your primary bucket name: telegraf
#输入主存储桶的保留期限-有效单位为纳秒(ns),微秒(us或µs),毫秒(ms),秒(s),分钟(m),小时(h),天(d)和星期(w)。在无限的保留期内不输入任何内容。
Please type your retention period in hours.
Or press ENTER for infinite.: 168
#确认主要用户,组织和存储桶的详细信息。
You have entered:
  Username:          root
  Organization:      InfluxData
  Bucket:            telegraf
  Retention Period:  168 hrs
Confirm? (y/n): y

Config default has been stored in /root/.influxdbv2/configs.
User    Organization    Bucket
root    InfluxData  telegraf
#查看配置
[root@cephadm ~]# influx config list
Active  Name    URL         Org
*   default http://localhost:8086   InfluxData
下面可以向influxdb中写入数据了,写入数据的方法有多种方式:the Telegraf plugins、the InfluxDB v2 API、the influx command line interface (CLI)、the InfluxDB UI、the InfluxDB v2 API client libraries.
配置telegraf
为了向influxdb写入数据,需要在telegraf.conf中启用influxdb_v2 输出插件。
默认开启的配置如下:
[root@cephadm ~]# cat /etc/telegraf/telegraf.conf | egrep -v '^#|^$|^  #'
[global_tags]
[agent]
  interval = "10s"
  round_interval = true
  metric_batch_size = 1000
  metric_buffer_limit = 10000
  collection_jitter = "0s"
  flush_interval = "10s"
  flush_jitter = "0s"
  precision = ""
  hostname = ""
  omit_hostname = false
[[outputs.influxdb]]
#influxdb_v2的配置如下
[[outputs.influxdb_v2]]
  ## The URLs of the InfluxDB cluster nodes.
  ##
  ## Multiple URLs can be specified for a single cluster, only ONE of the
  ## urls will be written to each interval.
  ## urls exp: http://127.0.0.1:8086
  urls = ["http://192.168.171.128:8086"]
  ## Token for authentication.
  #token 可以从命令行获取,也可以从web UI中获取
  token = "VD3szrMEsi1_eUCOypyfdAJnzIGr_6cRQPafb524OzVBRqvlXNQ2cymi5TslijWScqy286HyKw2bIBu5QsCPbw=="
  ## Organization is the name of the organization you wish to write to; must exist.
  organization = "InfluxData"
  ## Destination bucket to write into.
  bucket = "telegraf"
[[inputs.cpu]]
  percpu = true
  totalcpu = true
  collect_cpu_time = false
  report_active = false
[[inputs.disk]]
  ignore_fs = ["tmpfs", "devtmpfs", "devfs", "iso9660", "overlay", "aufs", "squashfs"]
[[inputs.diskio]]
[[inputs.kernel]]
[[inputs.mem]]
[[inputs.processes]]
[[inputs.swap]]
[[inputs.system]]

#####启动telegraf
[root@cephadm ~]# systemctl start telegraf
[root@cephadm ~]# systemctl status telegraf
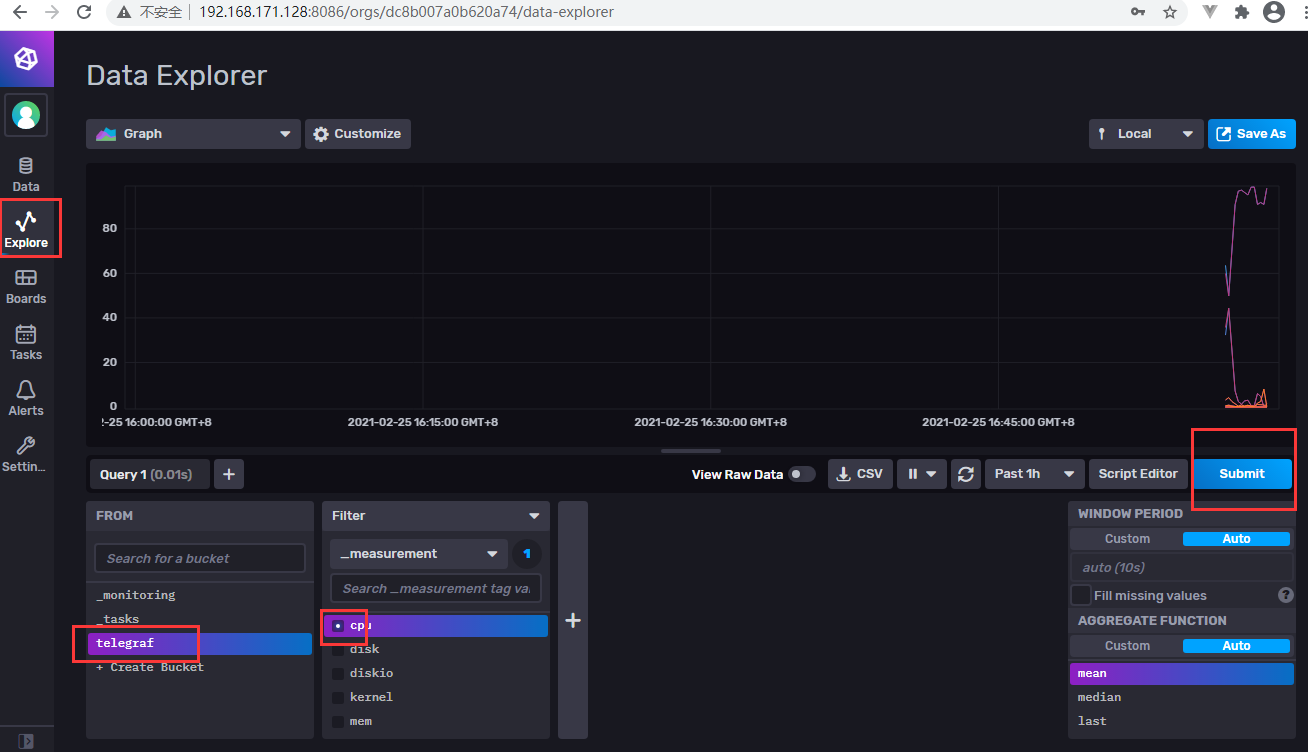
登陆influxdb 的ui查看数据(http://IP:8086 账号密码是初始化influxdb时创建的账号密码)

登陆评论:
使用GITHUB登陆